


Search







Recent Updates
-
Master MLB 26 Lindor Missions Using U4GM Tips
MLB 26's Francisco Lindor Milestone Program is one of the cleaner Diamond Dynasty grinds because the 99 OVR reward does not require every objective. You can reach the card at 300 points out of 350 available, and the fastest route is built around five Moments, 30 home runs, 129 runs, and 2,000 PXP with Mets or Guardians players. That makes the program easy to work into your normal games, especially if you are also managing your MLB 26 Stubs and building a competitive lineup.
How many points do you need for 99 OVR Francisco Lindor
The key detail is the 300-point requirement. The reward track offers 2,500 XP at 50 points, a The Show Pack at 100, another 2,500 XP at 150, a Ballin' is a Habit Pack at 200, and another 2,500 XP at 250. The Milestone Francisco Lindor card unlocks at 300 points, while the program continues to 350 points for players who want to finish everything.
That gap gives you room to skip two objectives. You do not need to treat the program like a checklist where every task has to be cleared before the featured card appears. Pick the objectives that fit your roster and playing habits, then focus your time on the route that reaches 300 with the least extra work.
What are the easiest Lindor Moments in MLB 26
The five Lindor Moments are the best starting point because they provide 50 points by themselves. Each Moment is worth 10 points, and the challenges are based on Lindor's home run milestones. They can be completed on Veteran difficulty, so they should be manageable even if your current Diamond Dynasty squad is still coming together.
Moments also give you a quick read on the card's swing and timing. Since Lindor is a switch hitter, pay attention to how comfortable you feel from both sides of the plate. Once the Moments are done, you already have one-sixth of the required points and can move into the longer stat-based objectives with a clear target.
Which Missions should you complete for the Lindor card
The most efficient combination is the 100-point home run Mission, the 100-point run Mission, and the 50-point Mets and Guardians PXP Mission. Hitting 30 home runs and scoring 129 runs are both broad objectives, so they can progress across any game mode rather than forcing you into one specific playlist. The 2,000 PXP requirement is more focused, but it also works naturally with the same lineup.
The remaining Missions are worth 25 points each. One asks for four wins in any game mode, and the other requires 750 PXP with any Francisco Lindor player item. They are useful as backup points, but they are not part of the shortest path to 99 OVR. If you complete one by accident while working on the main targets, that extra progress can give you more flexibility later.
How to grind the Lindor objectives efficiently
Use a lineup with as many Mets and Guardians players as your collection allows. Put eligible hitters near the top of the order so they receive more plate appearances, then keep those players active while chasing home runs and runs. This is where the program feels much better than a series of isolated tasks: the same games can produce PXP, runs, and home runs at the same time.
Choose a mode where you can score consistently and finish games without turning every objective into a long session. Power hitters help with the home run total, while speedy players can create extra scoring opportunities once they reach base. You do not need a perfect lineup for this grind. You need one that keeps the three main objectives moving together.
Is the 99 OVR Francisco Lindor card worth using
Lindor's value comes from the combination of switch hitting, shortstop defense, speed, and balanced offensive ability. That profile gives you lineup flexibility against both right-handed and left-handed pitching, while his defense makes him a natural option at shortstop. The card should be judged against the players already on your roster rather than in isolation.
Choose u4gm.com for your MLB 26 Stubs needs, where reliable payment processes, convenient trading methods, and extensive industry experience help provide a secure and worry-free account environment.
Master MLB 26 Lindor Missions Using U4GM TipsMLB 26's Francisco Lindor Milestone Program is one of the cleaner Diamond Dynasty grinds because the 99 OVR reward does not require every objective. You can reach the card at 300 points out of 350 available, and the fastest route is built around five Moments, 30 home runs, 129 runs, and 2,000 PXP with Mets or Guardians players. That makes the program easy to work into your normal games, especially if you are also managing your MLB 26 Stubs and building a competitive lineup.How many points do you need for 99 OVR Francisco LindorThe key detail is the 300-point requirement. The reward track offers 2,500 XP at 50 points, a The Show Pack at 100, another 2,500 XP at 150, a Ballin' is a Habit Pack at 200, and another 2,500 XP at 250. The Milestone Francisco Lindor card unlocks at 300 points, while the program continues to 350 points for players who want to finish everything.That gap gives you room to skip two objectives. You do not need to treat the program like a checklist where every task has to be cleared before the featured card appears. Pick the objectives that fit your roster and playing habits, then focus your time on the route that reaches 300 with the least extra work.What are the easiest Lindor Moments in MLB 26The five Lindor Moments are the best starting point because they provide 50 points by themselves. Each Moment is worth 10 points, and the challenges are based on Lindor's home run milestones. They can be completed on Veteran difficulty, so they should be manageable even if your current Diamond Dynasty squad is still coming together.Moments also give you a quick read on the card's swing and timing. Since Lindor is a switch hitter, pay attention to how comfortable you feel from both sides of the plate. Once the Moments are done, you already have one-sixth of the required points and can move into the longer stat-based objectives with a clear target.Which Missions should you complete for the Lindor cardThe most efficient combination is the 100-point home run Mission, the 100-point run Mission, and the 50-point Mets and Guardians PXP Mission. Hitting 30 home runs and scoring 129 runs are both broad objectives, so they can progress across any game mode rather than forcing you into one specific playlist. The 2,000 PXP requirement is more focused, but it also works naturally with the same lineup.The remaining Missions are worth 25 points each. One asks for four wins in any game mode, and the other requires 750 PXP with any Francisco Lindor player item. They are useful as backup points, but they are not part of the shortest path to 99 OVR. If you complete one by accident while working on the main targets, that extra progress can give you more flexibility later.How to grind the Lindor objectives efficientlyUse a lineup with as many Mets and Guardians players as your collection allows. Put eligible hitters near the top of the order so they receive more plate appearances, then keep those players active while chasing home runs and runs. This is where the program feels much better than a series of isolated tasks: the same games can produce PXP, runs, and home runs at the same time.Choose a mode where you can score consistently and finish games without turning every objective into a long session. Power hitters help with the home run total, while speedy players can create extra scoring opportunities once they reach base. You do not need a perfect lineup for this grind. You need one that keeps the three main objectives moving together.Is the 99 OVR Francisco Lindor card worth usingLindor's value comes from the combination of switch hitting, shortstop defense, speed, and balanced offensive ability. That profile gives you lineup flexibility against both right-handed and left-handed pitching, while his defense makes him a natural option at shortstop. The card should be judged against the players already on your roster rather than in isolation.Choose u4gm.com for your MLB 26 Stubs needs, where reliable payment processes, convenient trading methods, and extensive industry experience help provide a secure and worry-free account environment. 0 Comments 0 Shares 103 Views 0 Reviews
 -
Discover NBA 2K27 Jumpshot Setups With U4GM
A dependable jumper in NBA 2K27 isn't always the one with the quickest release. It's the one you can spot in a crowded game, after a hard stop, with a defender closing late. Height matters. Your 3PT rating matters. So does the point where your eyes naturally pick up the ball. Before spending your 2K27 MT on a fresh build or extra upgrades, narrow your choices to shots that actually suit how you play. A small guard who lives off quick stops needs something different from a 6'5" guard trying to shoot over long arms. Don't copy a setup just because someone else greened a few clips with it. Take it into a proper practice setting, shoot from your usual spots, and pay attention to what your hands and eyes are doing. That's where the right release starts to show itself.
Small Guard Options
Kyrie Irving is a strong place to start for shorter guards. His base feels clean on quick stops, and it doesn't leave you stuck in a long gather very often. Pair it with Keem Wallace and John Wall, using a 64/36 blend, then run it at 4/4 speed. Set the visual cue a few ticks behind Push. Most players will notice either the feet starting to move forward or the ball reaching the upper forehead. Both work, but pick one. Devin Booker is another good fit if Kyrie feels a bit too sharp. A 41/59 Ryan and Oscar blend at 3/4 speed gives it a smoother rhythm. The ball near the top of the forehead is easy enough to track. Stephen Curry can also feel natural for guards who want less stiffness in the motion. Try Collin Sexton and Oscar at 60/40. Start at 3/4 speed, then drop to 2/4 if you're rushing the cue. It's not a downgrade if your timing gets better.
Taller Builds Need More Space
With taller guards, release height becomes a bigger deal. You're not only looking for speed. You want a motion that gets the ball up where contests don't swallow it so easily. Devin Booker works here too, especially with Oscar and OG Anunoby at a 63/37 blend. At 3/4 speed, it has enough pace without feeling like the shot is gone before you can read it. If you're comfortable, move up to 4/4. Kyle Korver is worth a look for players who want that higher release point. Use Oscar and OG Anunoby at 58/42, with 3/4 speed. It's got a steady feel, and the ball reaching the top of the head is a solid reference. Ray Allen gives you another taller-build option. Oscar and Nate at 56/44, set to 4/4 speed, can work well when you want a quicker launch. In all three cases, don't stare at the meter. Watch the body motion and the ball position instead.
Purchase NBA 2K27 MT from u4gm.com with confidence, enjoying secure transactions, a smooth buying experience, and years of professional service dedicated to protecting your account safety.
Discover NBA 2K27 Jumpshot Setups With U4GMA dependable jumper in NBA 2K27 isn't always the one with the quickest release. It's the one you can spot in a crowded game, after a hard stop, with a defender closing late. Height matters. Your 3PT rating matters. So does the point where your eyes naturally pick up the ball. Before spending your 2K27 MT on a fresh build or extra upgrades, narrow your choices to shots that actually suit how you play. A small guard who lives off quick stops needs something different from a 6'5" guard trying to shoot over long arms. Don't copy a setup just because someone else greened a few clips with it. Take it into a proper practice setting, shoot from your usual spots, and pay attention to what your hands and eyes are doing. That's where the right release starts to show itself.Small Guard OptionsKyrie Irving is a strong place to start for shorter guards. His base feels clean on quick stops, and it doesn't leave you stuck in a long gather very often. Pair it with Keem Wallace and John Wall, using a 64/36 blend, then run it at 4/4 speed. Set the visual cue a few ticks behind Push. Most players will notice either the feet starting to move forward or the ball reaching the upper forehead. Both work, but pick one. Devin Booker is another good fit if Kyrie feels a bit too sharp. A 41/59 Ryan and Oscar blend at 3/4 speed gives it a smoother rhythm. The ball near the top of the forehead is easy enough to track. Stephen Curry can also feel natural for guards who want less stiffness in the motion. Try Collin Sexton and Oscar at 60/40. Start at 3/4 speed, then drop to 2/4 if you're rushing the cue. It's not a downgrade if your timing gets better.Taller Builds Need More SpaceWith taller guards, release height becomes a bigger deal. You're not only looking for speed. You want a motion that gets the ball up where contests don't swallow it so easily. Devin Booker works here too, especially with Oscar and OG Anunoby at a 63/37 blend. At 3/4 speed, it has enough pace without feeling like the shot is gone before you can read it. If you're comfortable, move up to 4/4. Kyle Korver is worth a look for players who want that higher release point. Use Oscar and OG Anunoby at 58/42, with 3/4 speed. It's got a steady feel, and the ball reaching the top of the head is a solid reference. Ray Allen gives you another taller-build option. Oscar and Nate at 56/44, set to 4/4 speed, can work well when you want a quicker launch. In all three cases, don't stare at the meter. Watch the body motion and the ball position instead.Purchase NBA 2K27 MT from u4gm.com with confidence, enjoying secure transactions, a smooth buying experience, and years of professional service dedicated to protecting your account safety. 0 Comments 1 Shares 302 Views 0 Reviews
 -
MLB 26 Supercharged Guide Featuring U4GM Tips for Elly and Jesús
A temporary boost can change the way a Diamond Dynasty lineup feels, even when it does not solve every problem on the roster. That is the interesting part of this Supercharged period. You are not just looking at a bigger Overall number; you are deciding which player gives you more useful options once the game gets moving. Elly De La Cruz and Jesús Sánchez ask different questions of your team, so it is worth testing both before spending your resources. If you are keeping an eye on MLB 26 Stubs, this is a good moment to try the boosted cards first and see whether a new addition is really necessary.
Why Elly Makes the Bigger Impact
Elly is the easier card to build around because his value does not depend on one specific situation. Put him at shortstop and you get speed, range, and enough power to make pitchers respect him. That mix matters more than it may look on paper. A routine ground ball can turn into an infield hit. A single can become a scoring opportunity when he takes an extra base. In the field, his reach can save a ball that another shortstop simply cannot get to.
You will notice his influence even during games where he is not crushing the ball. Opponents may rush throws because they know he can run. They may pitch differently with him on base. That pressure creates small advantages for the rest of the lineup. His swing might take a few at-bats to settle into, especially if you are used to a bigger or slower hitter, but the payoff is a card that keeps contributing between hits. For most teams, he belongs near the top of the order and should receive a proper run at shortstop before you make a judgment.
Where Sánchez Fits Best
Sánchez is less of an every-lineup answer, but that does not make him unhelpful. His left-handed swing gives you a useful way to approach right-handed pitching, and that can matter when your outfield is full of right-handed bats. Some players will love his timing straight away. Others may find that his at-bats feel less comfortable than those of their regular starter. That is normal. A card can have strong ratings and still fail to match the way you see the ball.
He makes the most sense for newer teams, budget-minded rosters, and players who rotate lineups for Events or Conquest. If your current left fielder is a weak spot, Sánchez may give you enough production to leave that position alone for a while. He is also handy from the bench when the opposing pitcher creates a favourable situation. On a stacked roster, though, he has to earn his place. A temporary boost alone is not a good reason to remove an outfielder who already performs well for you.
How to Test Them Without Guesswork
Use a simple test rather than judging either card after three plate appearances. Start Elly at shortstop for several games and bat him in a spot where he can see plenty of pitches. Watch how often his speed changes the inning, not just how many hits he collects. Notice the plays he reaches in the field, the throws he makes while moving away from first base, and whether his presence lets you take more chances on the bases. Those details are easy to miss when you focus only on the box score.
Give Sánchez a similar run, but place him in games where right-handed pitching is common. Pay attention to hard contact, late-inning at-bats, and how comfortable his swing feels when you are behind in the count. Try both players in Conquest or Events if you do not want to disturb your main Ranked Seasons lineup. You can also compare them with your current starters over the same number of games. That small bit of discipline will tell you far more than a quick look at their ratings.
Get MLB 26 Stubs at u4gm.com and benefit from safe transactions, comfortable service, and long-term expertise that ensures your account remains protected throughout the purchase process.
MLB 26 Supercharged Guide Featuring U4GM Tips for Elly and JesúsA temporary boost can change the way a Diamond Dynasty lineup feels, even when it does not solve every problem on the roster. That is the interesting part of this Supercharged period. You are not just looking at a bigger Overall number; you are deciding which player gives you more useful options once the game gets moving. Elly De La Cruz and Jesús Sánchez ask different questions of your team, so it is worth testing both before spending your resources. If you are keeping an eye on MLB 26 Stubs, this is a good moment to try the boosted cards first and see whether a new addition is really necessary.Why Elly Makes the Bigger ImpactElly is the easier card to build around because his value does not depend on one specific situation. Put him at shortstop and you get speed, range, and enough power to make pitchers respect him. That mix matters more than it may look on paper. A routine ground ball can turn into an infield hit. A single can become a scoring opportunity when he takes an extra base. In the field, his reach can save a ball that another shortstop simply cannot get to.You will notice his influence even during games where he is not crushing the ball. Opponents may rush throws because they know he can run. They may pitch differently with him on base. That pressure creates small advantages for the rest of the lineup. His swing might take a few at-bats to settle into, especially if you are used to a bigger or slower hitter, but the payoff is a card that keeps contributing between hits. For most teams, he belongs near the top of the order and should receive a proper run at shortstop before you make a judgment.Where Sánchez Fits BestSánchez is less of an every-lineup answer, but that does not make him unhelpful. His left-handed swing gives you a useful way to approach right-handed pitching, and that can matter when your outfield is full of right-handed bats. Some players will love his timing straight away. Others may find that his at-bats feel less comfortable than those of their regular starter. That is normal. A card can have strong ratings and still fail to match the way you see the ball.He makes the most sense for newer teams, budget-minded rosters, and players who rotate lineups for Events or Conquest. If your current left fielder is a weak spot, Sánchez may give you enough production to leave that position alone for a while. He is also handy from the bench when the opposing pitcher creates a favourable situation. On a stacked roster, though, he has to earn his place. A temporary boost alone is not a good reason to remove an outfielder who already performs well for you.How to Test Them Without GuessworkUse a simple test rather than judging either card after three plate appearances. Start Elly at shortstop for several games and bat him in a spot where he can see plenty of pitches. Watch how often his speed changes the inning, not just how many hits he collects. Notice the plays he reaches in the field, the throws he makes while moving away from first base, and whether his presence lets you take more chances on the bases. Those details are easy to miss when you focus only on the box score.Give Sánchez a similar run, but place him in games where right-handed pitching is common. Pay attention to hard contact, late-inning at-bats, and how comfortable his swing feels when you are behind in the count. Try both players in Conquest or Events if you do not want to disturb your main Ranked Seasons lineup. You can also compare them with your current starters over the same number of games. That small bit of discipline will tell you far more than a quick look at their ratings.Get MLB 26 Stubs at u4gm.com and benefit from safe transactions, comfortable service, and long-term expertise that ensures your account remains protected throughout the purchase process. 0 Comments 0 Shares 155 Views 0 Reviews
 -
How U4GM Helps Farm 50 Divines Per Hour in POE 2
Expedition is still one of the most reliable ways to build wealth in Path of Exile 2, especially if you prefer a farming route that rewards careful decisions rather than endless spending. You do not need to force every map into an expensive project. A sensible setup, a character that can survive dangerous encounters, and a good eye for valuable remnants are usually enough to create a steady income. If you are still preparing your character, having a useful reserve of POE 2 Currency will make the early setup far less stressful. The best results come from treating each map as a small puzzle. Choose the right tablets, read the available rumors, place your explosives with purpose, and do not waste strong resources on weak layouts.
Build a Practical Map Setup
Patch 0.5 changed the way high-end Expedition farming works. Alder Saga is no longer part of the normal event-league rotation, so it now appears at random on Grand Expedition maps. When it does appear, the five-rune combination can be extremely valuable, but you should not build your entire farming plan around seeing it every time. Tier 15 Waystones remain a comfortable foundation. They offer strong rewards without demanding the same level of investment as the most expensive maps. Start with a clean Waystone and improve it carefully. Monster Effect should be near the top of your wish list, followed by Monster Rarity and Item Rarity. Quantity and rarity omens can help, while corruption gives you a chance at an eight-mod result. Pack Size is useful in some situations, but it is not automatically better here. A six-mod map with Pack Size in place of a key monster modifier may be worth changing, while a strong eight-mod map can still be kept if the rest of the rolls are good.
Spend Tablets Where They Matter
Tablets can push a good map into excellent territory, but they can also eat through your funds quickly. For valuable regular maps, three Eradicated Tablets with the modifier that adds two random map modifiers can provide a strong boost. Increased Monster Effect is usually the standout choice because stronger monsters tend to produce better Expedition returns. Extra Rare Monsters are also useful, and Monster Rarity or Item Rarity can fill a weaker slot. Still, there is no reason to use premium tablets on every map. Two-mod tablets with Monster Effect, Rare Monsters, or Monster Rarity are often enough for a developing character. Match the cost of the tablet to the quality of the Waystone. That simple habit protects your resources and keeps the farming loop sustainable. Many players lose money by chasing the perfect setup on maps that were never worth the extra investment in the first place.
Use the Atlas and Rumors Properly
Jado is generally the aggressive Master choice for this strategy. Unexpected Missions, Eastern Knowledge, Partial Translations, and Keen Appraisal work well together, with Eastern Knowledge standing out because it can create more opportunities to adjust runes. Doryani is a sensible alternative when your character is not ready for the hardest encounters. A safer run that finishes cleanly is worth more than a failed attempt with a slightly higher ceiling. Desert suits players who want more monster power and denser rewards, while Forest gives a softer route for characters that still need room to grow. On the Atlas, look for extra Verisium remnants, additional Runic modifiers, more choices, stronger monsters, and faster explosive chains. Logbooks deserve close attention too. Pin the logbook, move an item in your inventory, and cycle through the hidden rumor options before committing to a route. Four or more suitable Grand Expedition rumors can make Alder Saga especially attractive. Fallen Skies is worth checking for Flux and extra Alder Saga opportunities, while Star Drinker can offer a rare quest reward that only drops once for each character.
Buy POE 2 Currency from u4gm.com and enjoy a secure, convenient purchasing process supported by years of industry experience, ensuring your account remains safe and protected.
How U4GM Helps Farm 50 Divines Per Hour in POE 2Expedition is still one of the most reliable ways to build wealth in Path of Exile 2, especially if you prefer a farming route that rewards careful decisions rather than endless spending. You do not need to force every map into an expensive project. A sensible setup, a character that can survive dangerous encounters, and a good eye for valuable remnants are usually enough to create a steady income. If you are still preparing your character, having a useful reserve of POE 2 Currency will make the early setup far less stressful. The best results come from treating each map as a small puzzle. Choose the right tablets, read the available rumors, place your explosives with purpose, and do not waste strong resources on weak layouts.Build a Practical Map SetupPatch 0.5 changed the way high-end Expedition farming works. Alder Saga is no longer part of the normal event-league rotation, so it now appears at random on Grand Expedition maps. When it does appear, the five-rune combination can be extremely valuable, but you should not build your entire farming plan around seeing it every time. Tier 15 Waystones remain a comfortable foundation. They offer strong rewards without demanding the same level of investment as the most expensive maps. Start with a clean Waystone and improve it carefully. Monster Effect should be near the top of your wish list, followed by Monster Rarity and Item Rarity. Quantity and rarity omens can help, while corruption gives you a chance at an eight-mod result. Pack Size is useful in some situations, but it is not automatically better here. A six-mod map with Pack Size in place of a key monster modifier may be worth changing, while a strong eight-mod map can still be kept if the rest of the rolls are good.Spend Tablets Where They MatterTablets can push a good map into excellent territory, but they can also eat through your funds quickly. For valuable regular maps, three Eradicated Tablets with the modifier that adds two random map modifiers can provide a strong boost. Increased Monster Effect is usually the standout choice because stronger monsters tend to produce better Expedition returns. Extra Rare Monsters are also useful, and Monster Rarity or Item Rarity can fill a weaker slot. Still, there is no reason to use premium tablets on every map. Two-mod tablets with Monster Effect, Rare Monsters, or Monster Rarity are often enough for a developing character. Match the cost of the tablet to the quality of the Waystone. That simple habit protects your resources and keeps the farming loop sustainable. Many players lose money by chasing the perfect setup on maps that were never worth the extra investment in the first place.Use the Atlas and Rumors ProperlyJado is generally the aggressive Master choice for this strategy. Unexpected Missions, Eastern Knowledge, Partial Translations, and Keen Appraisal work well together, with Eastern Knowledge standing out because it can create more opportunities to adjust runes. Doryani is a sensible alternative when your character is not ready for the hardest encounters. A safer run that finishes cleanly is worth more than a failed attempt with a slightly higher ceiling. Desert suits players who want more monster power and denser rewards, while Forest gives a softer route for characters that still need room to grow. On the Atlas, look for extra Verisium remnants, additional Runic modifiers, more choices, stronger monsters, and faster explosive chains. Logbooks deserve close attention too. Pin the logbook, move an item in your inventory, and cycle through the hidden rumor options before committing to a route. Four or more suitable Grand Expedition rumors can make Alder Saga especially attractive. Fallen Skies is worth checking for Flux and extra Alder Saga opportunities, while Star Drinker can offer a rare quest reward that only drops once for each character.Buy POE 2 Currency from u4gm.com and enjoy a secure, convenient purchasing process supported by years of industry experience, ensuring your account remains safe and protected. 0 Comments 0 Shares 158 Views 0 Reviews
 -
U4GM Guide to POE 2 Arc Totem Grenade Leveling
Arc Totems are worth building toward, but they are not the smoothest answer on a brand-new character. The early game asks for quick clearing, decent single-target damage, and gear that can be picked up rather than hunted for. That is why Grenades make so much sense at the start. They carry the campaign with very little fuss, leaving you free to save POE 2 Currency for the pieces that matter once maps begin. You will feel the difference almost straight away: Grenades keep packs moving, work well in awkward rooms, and do not punish you for wearing whatever solid rare items happen to drop.
Start With Grenades and Keep Moving
Cluster Grenades come into their own around level 14. Before that point, you can use whatever skill feels comfortable, but once Cluster Grenades are available, the campaign becomes much less of a stop-and-start job. Throw into a pack, run forward, and let the explosions finish the work behind you. It is a simple rhythm, though it is exactly what a league starter needs. Mirage Archer adds extra pressure without asking you to stand still, which is especially handy during story bosses. You are not trying to create a perfect endgame setup here. You are trying to reach maps with levels, useful quest rewards, and enough resources left to make a proper swap later. A focused run can clear the campaign, optional objectives, the Act 4 Grand Expedition, and the first two Ascendancy rewards in about seven hours. Your own time will vary, of course, but Grenades keep that route realistic even with ordinary gear.
Wait Until the Totem Setup Is Ready
A lot of players switch to Arc Totems too soon because the idea sounds good on paper. Then the character feels short on mana, Spirit, damage, or defences all at once. It is frustrating, and there is no real upside to doing it early. Stay with Grenades until roughly level 75 and aim to have three Ascendancy points completed. By then, the passive tree has enough shape to support the totems properly, and your equipment options are much better. Arc Totems shine when they can keep casting while you reposition. That gives the build a calmer feel in maps and creates safer boss windows. Let the totems work while you watch ground effects, dodge heavy hits, and place yourself somewhere sensible. It is not flashy in every moment, but it is dependable, which counts for a lot during the first few days of a league.
Spend on the Stats That Change the Build
The first functional Arc Totem version can be put together for around 10 Exalted Orbs, provided you shop with a bit of patience. Your wand is the main damage slot. Look for spell skill levels first, then cast speed and spell damage. A wand with +4 spell skills is a serious step up, though a slightly weaker option can carry you while prices are high. Spirit is just as important as damage. Try to reach about 225 total Spirit, starting with a Scepter that has 165 or more. A strong high-Spirit Scepter often improves the build more than an overpriced amulet. For jewellery, a +2 spell skill amulet is great, but a +1 version is completely fine early on. Use rings to patch mana, cast speed, and resistances. On your helmet and body armour, Energy Shield and defensive rolls matter more than chasing one fancy modifier. Boots should have movement speed, then resistances and life or Energy Shield where possible.
Clean Up the Passive Tree After the Swap
The Split Personality Templar jewel gives this build a useful way to reshape its tree without wasting too many points. During leveling, it is normal to take plain connecting nodes just to reach a strong cluster. Do not worry about making every point permanent. Once the jewel is in place and the Arc Totem setup is online, remove paths that no longer earn their keep. Those recovered points can go into Energy Shield, mana, spell damage, or other nodes that directly support the finished character. This is one of those details that can look minor, yet it changes how the build feels. Suddenly you have room for the defensive stats you were missing, and your resource pool stops feeling stretched. Keep your resistances capped before spending heavily on extra damage. A character that stays alive clears more maps per hour than one that hits harder but keeps returning to town.
Purchase POE 2 Currency from u4gm.com with confidence, enjoying secure transactions, a smooth buying experience, and years of professional service dedicated to protecting your account safety.
U4GM Guide to POE 2 Arc Totem Grenade LevelingArc Totems are worth building toward, but they are not the smoothest answer on a brand-new character. The early game asks for quick clearing, decent single-target damage, and gear that can be picked up rather than hunted for. That is why Grenades make so much sense at the start. They carry the campaign with very little fuss, leaving you free to save POE 2 Currency for the pieces that matter once maps begin. You will feel the difference almost straight away: Grenades keep packs moving, work well in awkward rooms, and do not punish you for wearing whatever solid rare items happen to drop.Start With Grenades and Keep MovingCluster Grenades come into their own around level 14. Before that point, you can use whatever skill feels comfortable, but once Cluster Grenades are available, the campaign becomes much less of a stop-and-start job. Throw into a pack, run forward, and let the explosions finish the work behind you. It is a simple rhythm, though it is exactly what a league starter needs. Mirage Archer adds extra pressure without asking you to stand still, which is especially handy during story bosses. You are not trying to create a perfect endgame setup here. You are trying to reach maps with levels, useful quest rewards, and enough resources left to make a proper swap later. A focused run can clear the campaign, optional objectives, the Act 4 Grand Expedition, and the first two Ascendancy rewards in about seven hours. Your own time will vary, of course, but Grenades keep that route realistic even with ordinary gear.Wait Until the Totem Setup Is ReadyA lot of players switch to Arc Totems too soon because the idea sounds good on paper. Then the character feels short on mana, Spirit, damage, or defences all at once. It is frustrating, and there is no real upside to doing it early. Stay with Grenades until roughly level 75 and aim to have three Ascendancy points completed. By then, the passive tree has enough shape to support the totems properly, and your equipment options are much better. Arc Totems shine when they can keep casting while you reposition. That gives the build a calmer feel in maps and creates safer boss windows. Let the totems work while you watch ground effects, dodge heavy hits, and place yourself somewhere sensible. It is not flashy in every moment, but it is dependable, which counts for a lot during the first few days of a league.Spend on the Stats That Change the BuildThe first functional Arc Totem version can be put together for around 10 Exalted Orbs, provided you shop with a bit of patience. Your wand is the main damage slot. Look for spell skill levels first, then cast speed and spell damage. A wand with +4 spell skills is a serious step up, though a slightly weaker option can carry you while prices are high. Spirit is just as important as damage. Try to reach about 225 total Spirit, starting with a Scepter that has 165 or more. A strong high-Spirit Scepter often improves the build more than an overpriced amulet. For jewellery, a +2 spell skill amulet is great, but a +1 version is completely fine early on. Use rings to patch mana, cast speed, and resistances. On your helmet and body armour, Energy Shield and defensive rolls matter more than chasing one fancy modifier. Boots should have movement speed, then resistances and life or Energy Shield where possible.Clean Up the Passive Tree After the SwapThe Split Personality Templar jewel gives this build a useful way to reshape its tree without wasting too many points. During leveling, it is normal to take plain connecting nodes just to reach a strong cluster. Do not worry about making every point permanent. Once the jewel is in place and the Arc Totem setup is online, remove paths that no longer earn their keep. Those recovered points can go into Energy Shield, mana, spell damage, or other nodes that directly support the finished character. This is one of those details that can look minor, yet it changes how the build feels. Suddenly you have room for the defensive stats you were missing, and your resource pool stops feeling stretched. Keep your resistances capped before spending heavily on extra damage. A character that stays alive clears more maps per hour than one that hits harder but keeps returning to town.Purchase POE 2 Currency from u4gm.com with confidence, enjoying secure transactions, a smooth buying experience, and years of professional service dedicated to protecting your account safety.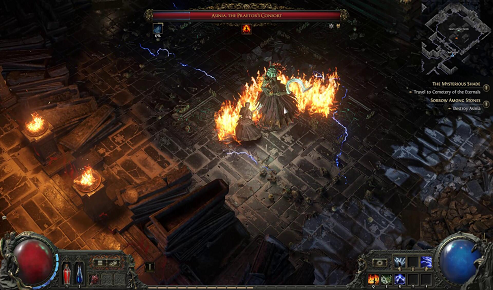 0 Comments 0 Shares 147 Views 0 Reviews
 -
MLB 26 New Cards: Best Weekend Classic Players at U4GM
Diamond Dynasty has a different feel once a wave of 99 OVR cards lands just before Weekend Classic. It is tempting to chase every name, especially if you have some MLB 26 Stubs ready to use, but that is rarely the best move. Most players already have at least a few spots that work well. The smarter question is simple: where does your current squad lose games? Maybe it is a starter who misses too many corners. Maybe your shortstop has no pop against a tough righty. The new drop gives you answers, but only if you pick cards for a job rather than for the number in the top corner.
Start With Pedro Martinez on the Mound
Pedro Martinez is the card that should catch the eye first. His appeal is not just the 99 rating. It is how comfortable he can feel pitch after pitch. He has the cutter, sinker, and enough off-speed stuff to make hitters think twice before selling out for one speed. In close Weekend Classic games, that matters more than a huge velocity number. You can show a fastball up, come back with a cutter off the plate, then use the sinker lower in the zone. It is not fancy. It just gives you options. Players often get into trouble because they repeat the same tunnel or keep missing in the same area. Pedro helps reduce that problem. His control lets you work the edges without feeling like every pitch is a gamble. CC Sabathia deserves a look for a similar reason. He brings a different shape and handedness to the rotation, which can be useful when opponents have built lineups around a certain matchup.
Sogard Can Fix More Than One Lineup Spot
Nick Sogard may not have the same headline value as Pedro, though he could be one of the more practical additions. Switch hitters make roster decisions easier. You do not have to reshuffle the order every time a left-handed starter appears, and you are less likely to carry a weak platoon option just to cover one matchup. That freedom is valuable in a short competitive run, where one awkward lineup choice can linger for several games. Sogard also gives players a clear early target because his path runs through Moments. Get those done before spending heavily. Some Moments will be annoying. A squared-up ball can find a glove, and an objective that looks easy can drag on. Take a break after a few rough attempts. Try a different approach at the plate. If the goal asks for a hit, do not swing like every pitch needs to leave the park. A clean single still moves the task forward.
Use the XP Path to Cover Real Needs
Manny Ramirez and David Wright bring different strengths through the XP path, so it is worth checking who they would replace before you commit time elsewhere. Manny is an obvious choice for a club that lacks fear in the middle of the order. If your opponents are comfortable pitching around your best hitter, another serious bat changes the whole inning. Wright is more about fit. He can strengthen the infield while giving you another dependable offensive presence. Then there are players such as Ozzie Smith, Jimmy Rollins, Michael Young, Nick Solak, Randy Arozarena, Jacob deGrom, and Brian Dozier. That is a lot of choice, and not every card needs to make your active roster. A defensive upgrade at short may help more than another corner outfielder. Extra speed can matter if you struggle to turn singles into scoring chances. A card with better contact may suit you better than a power-heavy option if you tend to chase pitches. Your own habits should guide the decision.
U4gm.com offers a dependable way to buy MLB 26 Stubs, combining safe trading procedures, user-friendly services, and years of professional experience to maintain the security and reliability of your account.
MLB 26 New Cards: Best Weekend Classic Players at U4GMDiamond Dynasty has a different feel once a wave of 99 OVR cards lands just before Weekend Classic. It is tempting to chase every name, especially if you have some MLB 26 Stubs ready to use, but that is rarely the best move. Most players already have at least a few spots that work well. The smarter question is simple: where does your current squad lose games? Maybe it is a starter who misses too many corners. Maybe your shortstop has no pop against a tough righty. The new drop gives you answers, but only if you pick cards for a job rather than for the number in the top corner.Start With Pedro Martinez on the MoundPedro Martinez is the card that should catch the eye first. His appeal is not just the 99 rating. It is how comfortable he can feel pitch after pitch. He has the cutter, sinker, and enough off-speed stuff to make hitters think twice before selling out for one speed. In close Weekend Classic games, that matters more than a huge velocity number. You can show a fastball up, come back with a cutter off the plate, then use the sinker lower in the zone. It is not fancy. It just gives you options. Players often get into trouble because they repeat the same tunnel or keep missing in the same area. Pedro helps reduce that problem. His control lets you work the edges without feeling like every pitch is a gamble. CC Sabathia deserves a look for a similar reason. He brings a different shape and handedness to the rotation, which can be useful when opponents have built lineups around a certain matchup.Sogard Can Fix More Than One Lineup SpotNick Sogard may not have the same headline value as Pedro, though he could be one of the more practical additions. Switch hitters make roster decisions easier. You do not have to reshuffle the order every time a left-handed starter appears, and you are less likely to carry a weak platoon option just to cover one matchup. That freedom is valuable in a short competitive run, where one awkward lineup choice can linger for several games. Sogard also gives players a clear early target because his path runs through Moments. Get those done before spending heavily. Some Moments will be annoying. A squared-up ball can find a glove, and an objective that looks easy can drag on. Take a break after a few rough attempts. Try a different approach at the plate. If the goal asks for a hit, do not swing like every pitch needs to leave the park. A clean single still moves the task forward.Use the XP Path to Cover Real NeedsManny Ramirez and David Wright bring different strengths through the XP path, so it is worth checking who they would replace before you commit time elsewhere. Manny is an obvious choice for a club that lacks fear in the middle of the order. If your opponents are comfortable pitching around your best hitter, another serious bat changes the whole inning. Wright is more about fit. He can strengthen the infield while giving you another dependable offensive presence. Then there are players such as Ozzie Smith, Jimmy Rollins, Michael Young, Nick Solak, Randy Arozarena, Jacob deGrom, and Brian Dozier. That is a lot of choice, and not every card needs to make your active roster. A defensive upgrade at short may help more than another corner outfielder. Extra speed can matter if you struggle to turn singles into scoring chances. A card with better contact may suit you better than a power-heavy option if you tend to chase pitches. Your own habits should guide the decision.U4gm.com offers a dependable way to buy MLB 26 Stubs, combining safe trading procedures, user-friendly services, and years of professional experience to maintain the security and reliability of your account. 0 Comments 0 Shares 190 Views 0 Reviews
 -
How U4GM Covers Diablo 4 S15 Soul Splinters PTR Builds
Season 15 is asking Diablo 4 players to rethink how they build a character. Soul Splinters are not ordinary upgrades that you equip and forget. Each one gives you a useful effect, then takes something away. That trade can feel brilliant on one build and completely awkward on another. Before spending time on Diablo 4 Items, it is worth checking how your chosen Splinter affects resource costs, critical hits, movement, toughness, and the kind of content you actually play. The Season 15 PTR is still changing, so the numbers may move before launch. The basic idea, though, is already clear: the best choice depends on how well the drawback fits your character.
Match the Splinter to Your Damage Plan
Black Soulstone looks like the most comfortable all-round option for many players. It gains damage stacks as enemies fall, which makes it feel natural during Helltides, dungeon runs, and any activity packed with monsters. You keep moving, keep killing, and the effect stays useful. It is less impressive in a slow boss fight where there are not many targets around. That is a fair trade for a farming setup.
Anguish is more demanding. It boosts Critical Strike Chance and Attack Speed, so a crit-focused build can get a noticeable lift from it. The catch is a 30% increase to Primary Resource costs. You will feel that almost immediately if your skills already drain resource quickly. A character with strong recovery, cooldown support, or cheap core skills may handle it well. Someone who is constantly waiting for resource to return probably will not. Hellfire takes a different route by pushing damage while dropping Critical Strike Chance to zero. That makes it a much better fit for damage-over-time, Overpower, and other non-crit setups.
Survival, Movement, and Close-Range Pressure
Not every character needs another offensive boost. Sin gives more Maximum Life but cuts Maximum Primary Resource, which can work nicely on a sturdy build with dependable resource support. It is the sort of effect that looks average on paper and becomes much better once the rest of the character is in place.
Pain is aimed at players who keep getting knocked out in difficult encounters. Its Damage Reduction is valuable, but the 30% Movement Speed loss is not small. A slow, defensive build may barely care. A mobile melee character may hate it. Mother is almost the reverse. It supports aggressive play by granting Unhindered and making enemies Vulnerable when you touch them, yet repeated contact can lead to a four-second Stun. Unstoppable effects become far more important here. If you like diving straight into a pack, Mother can be exciting, but you need a plan for the punishment that follows.
Choose Effects Based on the Activity
Lies is a farming tool rather than a serious pushing choice. It improves Gold, crafting materials, and Experience gains, which can speed up seasonal progress when you are running easier content. The character remains Weakened and Vulnerable, so the defensive cost is obvious. That may be acceptable while gathering materials or levelling an alt. It is a poor bargain when every mistake in an endgame run already hurts.
Damnation is built for the opposite mood. After Elite Packs are defeated, Monster Power rises, putting more pressure on your damage and defences. It is useful when you want a tougher test and your build has room to spare. Do not equip it just because a harder setting sounds like better loot. If your character is already struggling, the extra pressure will only slow the run down. A practical setup might use Black Soulstone for everyday farming, Lies for reward-focused sessions, and Damnation only when the build is ready to push.
Choose u4gm.com for your MLB 26 Stubs needs, where reliable payment processes, convenient trading methods, and extensive industry experience help provide a secure and worry-free account environment.
How U4GM Covers Diablo 4 S15 Soul Splinters PTR BuildsSeason 15 is asking Diablo 4 players to rethink how they build a character. Soul Splinters are not ordinary upgrades that you equip and forget. Each one gives you a useful effect, then takes something away. That trade can feel brilliant on one build and completely awkward on another. Before spending time on Diablo 4 Items, it is worth checking how your chosen Splinter affects resource costs, critical hits, movement, toughness, and the kind of content you actually play. The Season 15 PTR is still changing, so the numbers may move before launch. The basic idea, though, is already clear: the best choice depends on how well the drawback fits your character.Match the Splinter to Your Damage PlanBlack Soulstone looks like the most comfortable all-round option for many players. It gains damage stacks as enemies fall, which makes it feel natural during Helltides, dungeon runs, and any activity packed with monsters. You keep moving, keep killing, and the effect stays useful. It is less impressive in a slow boss fight where there are not many targets around. That is a fair trade for a farming setup.Anguish is more demanding. It boosts Critical Strike Chance and Attack Speed, so a crit-focused build can get a noticeable lift from it. The catch is a 30% increase to Primary Resource costs. You will feel that almost immediately if your skills already drain resource quickly. A character with strong recovery, cooldown support, or cheap core skills may handle it well. Someone who is constantly waiting for resource to return probably will not. Hellfire takes a different route by pushing damage while dropping Critical Strike Chance to zero. That makes it a much better fit for damage-over-time, Overpower, and other non-crit setups.Survival, Movement, and Close-Range PressureNot every character needs another offensive boost. Sin gives more Maximum Life but cuts Maximum Primary Resource, which can work nicely on a sturdy build with dependable resource support. It is the sort of effect that looks average on paper and becomes much better once the rest of the character is in place.Pain is aimed at players who keep getting knocked out in difficult encounters. Its Damage Reduction is valuable, but the 30% Movement Speed loss is not small. A slow, defensive build may barely care. A mobile melee character may hate it. Mother is almost the reverse. It supports aggressive play by granting Unhindered and making enemies Vulnerable when you touch them, yet repeated contact can lead to a four-second Stun. Unstoppable effects become far more important here. If you like diving straight into a pack, Mother can be exciting, but you need a plan for the punishment that follows.Choose Effects Based on the ActivityLies is a farming tool rather than a serious pushing choice. It improves Gold, crafting materials, and Experience gains, which can speed up seasonal progress when you are running easier content. The character remains Weakened and Vulnerable, so the defensive cost is obvious. That may be acceptable while gathering materials or levelling an alt. It is a poor bargain when every mistake in an endgame run already hurts.Damnation is built for the opposite mood. After Elite Packs are defeated, Monster Power rises, putting more pressure on your damage and defences. It is useful when you want a tougher test and your build has room to spare. Do not equip it just because a harder setting sounds like better loot. If your character is already struggling, the extra pressure will only slow the run down. A practical setup might use Black Soulstone for everyday farming, Lies for reward-focused sessions, and Damnation only when the build is ready to push.Choose u4gm.com for your MLB 26 Stubs needs, where reliable payment processes, convenient trading methods, and extensive industry experience help provide a secure and worry-free account environment.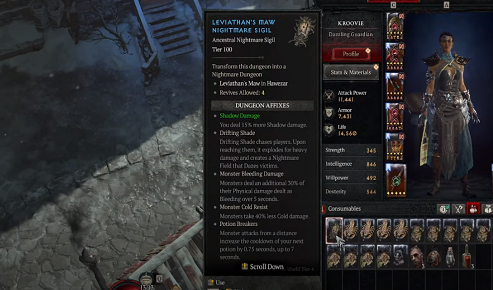 0 Comments 0 Shares 156 Views 0 Reviews
 -
How U4GM Explains POE 2 Patch 0.5.5 Charm Reworks
Patch 0.5.5 may give Path of Exile 2's charm system the kind of attention players have been waiting for. Right now, charms often feel like a quick answer to one annoying encounter: equip freeze protection here, swap in bleed protection there, then forget about them. That could change if the reported six-slot direction becomes part of the patch. Anyone holding POE 2 Currency for a future character should keep an eye on the announcement rather than locking into costly gear too early. More slots would not just mean more defence. It could change how players plan their passive tree, belt choice, unique items, and even their approach to difficult bosses. A character that currently runs two practical charms might suddenly have room for a proper package built around its weaknesses and strengths.
More Slots, More Real Choices
Six charm slots would make the system feel less like a maintenance job and more like character building. A sturdy melee character could carry protection against several ailments while still leaving space for something that improves movement or recovery. A fast ranged build might use charms to cover the defences it normally skips. It is easy to picture players keeping a few different sets in their stash too. One setup for mapping, another for boss fights, and perhaps a third for content with heavy crowd control. That is where the interesting decisions start. You would not simply ask, "What effect is hurting me right now?" You would ask what your build is missing across a whole session. There may also be a reason not to fill every slot. Magnum Opus already points towards that sort of choice, since empty charm slots can improve a charm's effect. If six slots arrive, leaving one or two open could become a deliberate trade instead of something that only happens while levelling.
Charm Effects Need a Wider Job
The current elemental charms have a clear place early on, especially when resistances and ailment protection are still being sorted out. Later, though, many players will replace them without much thought. A broader pool of effects could fix that. An Electrocute-focused charm seems like an obvious missing option, but there is room for far more than ailment counters. Charms could offer short bursts of speed, help with mana or life recovery, reward a recent dodge, or strengthen a skill after meeting a condition. The key is not making every charm a damage button. That would flatten the choices fast. Better charm design would give different builds different reasons to care. A minion player, a slam player, and a caster should not all reach for the same six pieces. Small, focused effects can be enough when they interact well with the rest of a character. Players usually enjoy finding those odd little connections that look minor on paper but feel great in actual play.
U4gm.com offers a dependable way to buy POE 2 Currency, combining safe trading procedures, user-friendly services, and years of professional experience to maintain the security and reliability of your account.
How U4GM Explains POE 2 Patch 0.5.5 Charm ReworksPatch 0.5.5 may give Path of Exile 2's charm system the kind of attention players have been waiting for. Right now, charms often feel like a quick answer to one annoying encounter: equip freeze protection here, swap in bleed protection there, then forget about them. That could change if the reported six-slot direction becomes part of the patch. Anyone holding POE 2 Currency for a future character should keep an eye on the announcement rather than locking into costly gear too early. More slots would not just mean more defence. It could change how players plan their passive tree, belt choice, unique items, and even their approach to difficult bosses. A character that currently runs two practical charms might suddenly have room for a proper package built around its weaknesses and strengths.More Slots, More Real ChoicesSix charm slots would make the system feel less like a maintenance job and more like character building. A sturdy melee character could carry protection against several ailments while still leaving space for something that improves movement or recovery. A fast ranged build might use charms to cover the defences it normally skips. It is easy to picture players keeping a few different sets in their stash too. One setup for mapping, another for boss fights, and perhaps a third for content with heavy crowd control. That is where the interesting decisions start. You would not simply ask, "What effect is hurting me right now?" You would ask what your build is missing across a whole session. There may also be a reason not to fill every slot. Magnum Opus already points towards that sort of choice, since empty charm slots can improve a charm's effect. If six slots arrive, leaving one or two open could become a deliberate trade instead of something that only happens while levelling.Charm Effects Need a Wider JobThe current elemental charms have a clear place early on, especially when resistances and ailment protection are still being sorted out. Later, though, many players will replace them without much thought. A broader pool of effects could fix that. An Electrocute-focused charm seems like an obvious missing option, but there is room for far more than ailment counters. Charms could offer short bursts of speed, help with mana or life recovery, reward a recent dodge, or strengthen a skill after meeting a condition. The key is not making every charm a damage button. That would flatten the choices fast. Better charm design would give different builds different reasons to care. A minion player, a slam player, and a caster should not all reach for the same six pieces. Small, focused effects can be enough when they interact well with the rest of a character. Players usually enjoy finding those odd little connections that look minor on paper but feel great in actual play.U4gm.com offers a dependable way to buy POE 2 Currency, combining safe trading procedures, user-friendly services, and years of professional experience to maintain the security and reliability of your account.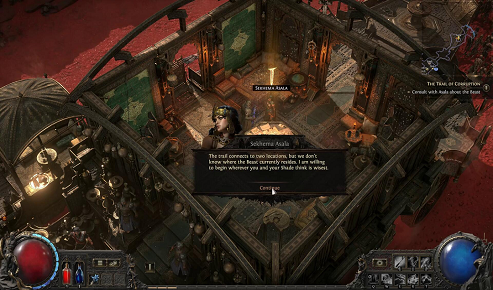 0 Comments 0 Shares 160 Views 0 Reviews
 -
Why U4GM Recommends These MLB 26 Shark Map Routes
Diamond Dynasty players looking for a quick, low-stress Conquest run have a good reason to revisit the Shark Map after its August 25, 2026 return. It is built for steady progress rather than a long grind. You can claim a large share of the board through simulations, pick up hidden rewards along the way, and save your actual games for the strongholds that matter. That makes it a handy place to earn packs, seasonal XP, player progress, and MLB 26 Stubs while keeping your usual Diamond Dynasty plans moving. It is also a nice change of pace when ranked games are not what you feel like playing.
Take Control of the Middle First
The easiest mistake is heading straight for a stronghold because it is sitting close by. It feels productive, but it usually leaves you short on fans and forces tougher difficulty settings than you need. Start in the centre of the shark instead. Simulate nearby empty spaces, connect your territories, and create a wide area where your fan count can grow safely. Three captures in a turn is a sensible rhythm if the board allows it. You will notice the difference after a couple of turns: more reinforcements, fewer weak edges, and more freedom to choose where to go next. From there, work outward toward the fin, then the head. Those routes often reveal reward spaces without asking you to play another three-inning game.
Wait Until the Numbers Are in Your Favour
Strongholds do not need to be rushed. Give yourself time to build a proper pile of reinforcements first. Around 25 fans is a comfortable point for many players, though the important thing is keeping a clear advantage over the defending team. A two-to-one lead is good; three-to-one is even better if you want Rookie difficulty and a simple win. It can be tempting to attack with only a small edge, especially when you are one tile away. Most of the time, waiting one more turn is faster than replaying a close game. Once the main strongholds are gone, the board loses much of its pressure. At that point, stack fans where needed, simulate the leftover spaces, and clean up every hidden tile before leaving the map.
Use Live Games for More Than One Goal
The few games you do play should pull double duty. Put Team Affinity players in the lineup, bring cards that still need Parallel XP, and use pitchers whose missions need innings or strikeouts. Conquest games are short, so there is no reason to treat them like exhibition matches. A lineup with a few dependable contact bats, one or two home-run threats, and a bench that supports your current objectives tends to work better than chasing the highest overall at every spot. On the mound, spread the workload around. Starter energy can disappear quickly in this mode, and a reliable reliever with a good slider or changeup can make the last inning painless. Patient hitting matters too. CPU pitchers on lower settings will often leave something over the plate if you make them work.
Watch the Rewards as You Clear
The Shark Map is worth completing for more than the standard territory rewards. Hidden spaces may hold stubs, Show packs, or other useful items, while the full board can include choice packs and higher-value player opportunities. Reported rewards have included Vault Choice Packs, Deluxe Choice Packs, All-Star Night packs, and Live Series cards rated 88 or higher. The repeatable side is just as useful for regular players: a full run can bring 5,000 seasonal XP and a Premier Pipeline Pack. Do not open every pack the second it appears if you are trying to manage your roster carefully. A newly released card can carry stronger market value early on, while a duplicate may be more useful as currency for a target card than as another item sitting in your collection.
Get MLB 26 Stubs at u4gm.com and benefit from safe transactions, comfortable service, and long-term expertise that ensures your account remains protected throughout the purchase process.
Why U4GM Recommends These MLB 26 Shark Map RoutesDiamond Dynasty players looking for a quick, low-stress Conquest run have a good reason to revisit the Shark Map after its August 25, 2026 return. It is built for steady progress rather than a long grind. You can claim a large share of the board through simulations, pick up hidden rewards along the way, and save your actual games for the strongholds that matter. That makes it a handy place to earn packs, seasonal XP, player progress, and MLB 26 Stubs while keeping your usual Diamond Dynasty plans moving. It is also a nice change of pace when ranked games are not what you feel like playing.Take Control of the Middle FirstThe easiest mistake is heading straight for a stronghold because it is sitting close by. It feels productive, but it usually leaves you short on fans and forces tougher difficulty settings than you need. Start in the centre of the shark instead. Simulate nearby empty spaces, connect your territories, and create a wide area where your fan count can grow safely. Three captures in a turn is a sensible rhythm if the board allows it. You will notice the difference after a couple of turns: more reinforcements, fewer weak edges, and more freedom to choose where to go next. From there, work outward toward the fin, then the head. Those routes often reveal reward spaces without asking you to play another three-inning game.Wait Until the Numbers Are in Your FavourStrongholds do not need to be rushed. Give yourself time to build a proper pile of reinforcements first. Around 25 fans is a comfortable point for many players, though the important thing is keeping a clear advantage over the defending team. A two-to-one lead is good; three-to-one is even better if you want Rookie difficulty and a simple win. It can be tempting to attack with only a small edge, especially when you are one tile away. Most of the time, waiting one more turn is faster than replaying a close game. Once the main strongholds are gone, the board loses much of its pressure. At that point, stack fans where needed, simulate the leftover spaces, and clean up every hidden tile before leaving the map.Use Live Games for More Than One GoalThe few games you do play should pull double duty. Put Team Affinity players in the lineup, bring cards that still need Parallel XP, and use pitchers whose missions need innings or strikeouts. Conquest games are short, so there is no reason to treat them like exhibition matches. A lineup with a few dependable contact bats, one or two home-run threats, and a bench that supports your current objectives tends to work better than chasing the highest overall at every spot. On the mound, spread the workload around. Starter energy can disappear quickly in this mode, and a reliable reliever with a good slider or changeup can make the last inning painless. Patient hitting matters too. CPU pitchers on lower settings will often leave something over the plate if you make them work.Watch the Rewards as You ClearThe Shark Map is worth completing for more than the standard territory rewards. Hidden spaces may hold stubs, Show packs, or other useful items, while the full board can include choice packs and higher-value player opportunities. Reported rewards have included Vault Choice Packs, Deluxe Choice Packs, All-Star Night packs, and Live Series cards rated 88 or higher. The repeatable side is just as useful for regular players: a full run can bring 5,000 seasonal XP and a Premier Pipeline Pack. Do not open every pack the second it appears if you are trying to manage your roster carefully. A newly released card can carry stronger market value early on, while a duplicate may be more useful as currency for a target card than as another item sitting in your collection.Get MLB 26 Stubs at u4gm.com and benefit from safe transactions, comfortable service, and long-term expertise that ensures your account remains protected throughout the purchase process. 0 Comments 0 Shares 145 Views 0 Reviews
 -
U4GM Mistfall Hunter Wither Knight Build Guide
Wither Knight feels like a different class after the recent balance changes. The Greatsword kit is quicker, the first Light Strike carries you further, and the whole attack flow feels less stiff in real matches. You still need to pick your moment, but you are no longer waiting helplessly while a faster opponent slips away. For players putting together a close-range setup, Mistfall Hunter Gyldenblod can also help improve the gear behind the build, especially when you are trying to raise both pressure and staying power. This guide focuses on a practical PvP approach using Thorn Guide, Breakthrough Charge, and Parry. It is not built around throwing every skill at once. The idea is to pull enemies into your range, make them commit, and then punish the mistake.
Build Around Control, Not Just Damage
Thorn Guide is the skill that makes the rest of the setup work. Its pull gives you a way to deal with mobile players who would otherwise keep circling outside Greatsword range. The Joint Pierce talent is worth taking because the movement reduction and shorter dodge distance make the target much easier to hold in place. Once Thorn Guide connects, start with a few Light Attacks rather than rushing straight into your biggest ability. A Heavy Attack followed by Wither is usually a better opening. It forces a reaction and leaves the target in the condition needed for your finisher. Breakthrough Charge should come after that setup, not before it. Its area is broad enough to land reliably, and the follow-up hit catches players who think they have already moved clear. When the target is affected by Wither, the right talent turns the charge into a serious finishing tool.
Use Parry When the Opponent Commits
Parry is easy to waste because it feels tempting whenever somebody gets close. Try not to press it on instinct. Watch the weapon animation, listen for the attack cue, and wait until the opponent has actually committed. With the Unstoppable talent, a successful Parry gives your next counterattack Super Armor. That small window can completely change a melee exchange. You absorb the incoming pressure, interrupt the other player's rhythm, and answer with your own attack before they can reset. This is especially useful against classes that rely on a short burst of close-range hits. A simple response is Parry, counterattack, Thorn Guide, Wither, then Breakthrough Charge. It will not land every time, of course. Good players may hold their attack or step away. That is still useful information, since it gives you a chance to regain space without spending every resource.
Energy, Gear, and Matchup Advice
Wither Knight is much better at staying on top of a target now, but the class can still run out of Energy during a long chase. Momentum helps during extended fights, yet it is not a reason to pursue someone across the entire arena. If your pull misses and the opponent still has movement skills ready, take a breath and wait for another opening. Against ranged classes, use walls, corners, and uneven ground to reduce the time you spend in open space. Make them use an escape option before you commit Breakthrough Charge. Once those tools are gone, Thorn Guide becomes far more threatening. For gear, Valor and Strife provide the pressure most players expect, while Resilience gives you a better chance of surviving the return damage. Do not build for raw attack alone. A Greatsword fighter has to stand close, so physical resistance, magical resistance, and shorter debuff duration can matter just as much as another damage increase.
Buy Mistfall Hunter Gyldenblod from u4gm.com and enjoy a secure, convenient purchasing process supported by years of industry experience, ensuring your account remains safe and protected.
U4GM Mistfall Hunter Wither Knight Build GuideWither Knight feels like a different class after the recent balance changes. The Greatsword kit is quicker, the first Light Strike carries you further, and the whole attack flow feels less stiff in real matches. You still need to pick your moment, but you are no longer waiting helplessly while a faster opponent slips away. For players putting together a close-range setup, Mistfall Hunter Gyldenblod can also help improve the gear behind the build, especially when you are trying to raise both pressure and staying power. This guide focuses on a practical PvP approach using Thorn Guide, Breakthrough Charge, and Parry. It is not built around throwing every skill at once. The idea is to pull enemies into your range, make them commit, and then punish the mistake.Build Around Control, Not Just DamageThorn Guide is the skill that makes the rest of the setup work. Its pull gives you a way to deal with mobile players who would otherwise keep circling outside Greatsword range. The Joint Pierce talent is worth taking because the movement reduction and shorter dodge distance make the target much easier to hold in place. Once Thorn Guide connects, start with a few Light Attacks rather than rushing straight into your biggest ability. A Heavy Attack followed by Wither is usually a better opening. It forces a reaction and leaves the target in the condition needed for your finisher. Breakthrough Charge should come after that setup, not before it. Its area is broad enough to land reliably, and the follow-up hit catches players who think they have already moved clear. When the target is affected by Wither, the right talent turns the charge into a serious finishing tool.Use Parry When the Opponent CommitsParry is easy to waste because it feels tempting whenever somebody gets close. Try not to press it on instinct. Watch the weapon animation, listen for the attack cue, and wait until the opponent has actually committed. With the Unstoppable talent, a successful Parry gives your next counterattack Super Armor. That small window can completely change a melee exchange. You absorb the incoming pressure, interrupt the other player's rhythm, and answer with your own attack before they can reset. This is especially useful against classes that rely on a short burst of close-range hits. A simple response is Parry, counterattack, Thorn Guide, Wither, then Breakthrough Charge. It will not land every time, of course. Good players may hold their attack or step away. That is still useful information, since it gives you a chance to regain space without spending every resource.Energy, Gear, and Matchup AdviceWither Knight is much better at staying on top of a target now, but the class can still run out of Energy during a long chase. Momentum helps during extended fights, yet it is not a reason to pursue someone across the entire arena. If your pull misses and the opponent still has movement skills ready, take a breath and wait for another opening. Against ranged classes, use walls, corners, and uneven ground to reduce the time you spend in open space. Make them use an escape option before you commit Breakthrough Charge. Once those tools are gone, Thorn Guide becomes far more threatening. For gear, Valor and Strife provide the pressure most players expect, while Resilience gives you a better chance of surviving the return damage. Do not build for raw attack alone. A Greatsword fighter has to stand close, so physical resistance, magical resistance, and shorter debuff duration can matter just as much as another damage increase.Buy Mistfall Hunter Gyldenblod from u4gm.com and enjoy a secure, convenient purchasing process supported by years of industry experience, ensuring your account remains safe and protected. 0 Comments 0 Shares 108 Views 0 Reviews
 -
U4GM Guide To POE 2 Fast Breach Profits
Fast mapping can be more profitable than clever mapping, and Bridge High Blood runs are a good example. If you have a build that handles Tier 15 maps without stopping every few seconds, this is a clean way to build up POE 2 Currency through Breaches rather than fiddly encounter choices. The loop is easy to learn: enter, hunt down Breaches, grab High Blood and the best Womb Gifts, then get back out. You are not trying to clear every corner or inspect every rare drop. You are trying to keep the next map coming. That is why this setup suits players who find Expedition a bit too slow, too busy, or just not much fun after a long session.
Set Up for Speed, Not Bragging Rights
Tier 15 corrupted maps with eight modifiers are the usual base for this farm. They add plenty of ordinary monster loot, which gives the run a nice extra layer of value. Still, do not expect the map mods themselves to suddenly double your High Blood or Womb Gift returns. Their job is mostly to improve the loot that drops around the Breaches. If an eight-mod T15 turns your map into a six-minute struggle, it is probably not worth it. A slightly easier map finished in four minutes will often win over the course of an hour. Before you start, line up four Bridge Tablets. High Blood quantity is the roll you care about most. Womb Gift quantity comes next. A Womb Gift bonus around 53% to 60% is a solid target, and tablets with those useful rolls have generally been a much smaller investment than the gear and setup required for many premium farming plans.
Atlas Choices and the Actual Map Route
You do not need a giant Atlas puzzle for this one. Unexpected Missions is useful because it adds another random modifier to corrupted Waystones, feeding the extra ground-loot side of the strategy. Partial Translations matters even more, as it boosts the explicit modifiers on your tablets. That means more value from the High Blood and Womb Gift rolls you paid for. Other nodes can help, but they are not the reason the farm works. In the map, keep it simple. Find each Breach, clear it quickly, collect the important drops, and move on. Most players lose time by treating every pack as mandatory. It is not. Skip isolated monsters and awkward detours unless they lead to a Breach or obvious reward. A good loot filter helps here. High Blood is first priority, followed by worthwhile Womb Gifts, currency, tablets, and items that are actually likely to sell.
Know What to Keep and When to Convert
Womb Gifts can eat up inventory space fast, so be picky. Lavish and Ornate Womb Gifts are usually the ones worth stopping for, with Lavish gifts often valued much higher than the lower-end options. Bandit and Signet gifts may look tempting when they pile up, but they can slow down a fast rotation if you are hauling everything back to town. High Blood is where the dependable income sits. Convert it regularly into Catalysts instead of letting it collect dust. Lower-level Womb Gifts can be handy for conversion because they require less High Blood, and testing has not shown a huge reward gap that always justifies using higher-level gifts. On the Genesis 3 side, take the Birth Catalyst options you can get and steer points towards Catalyst rewards, especially chances for Birth Catalysts to become Jewel Catalysts. Also watch the storage cap. At 100,000 High Blood, new drops are wasted. It is an easy mistake, and it hurts more than missing one rare item.
Get POE 2 Currency at u4gm.com and benefit from safe transactions, comfortable service, and long-term expertise that ensures your account remains protected throughout the purchase process.
U4GM Guide To POE 2 Fast Breach ProfitsFast mapping can be more profitable than clever mapping, and Bridge High Blood runs are a good example. If you have a build that handles Tier 15 maps without stopping every few seconds, this is a clean way to build up POE 2 Currency through Breaches rather than fiddly encounter choices. The loop is easy to learn: enter, hunt down Breaches, grab High Blood and the best Womb Gifts, then get back out. You are not trying to clear every corner or inspect every rare drop. You are trying to keep the next map coming. That is why this setup suits players who find Expedition a bit too slow, too busy, or just not much fun after a long session.Set Up for Speed, Not Bragging RightsTier 15 corrupted maps with eight modifiers are the usual base for this farm. They add plenty of ordinary monster loot, which gives the run a nice extra layer of value. Still, do not expect the map mods themselves to suddenly double your High Blood or Womb Gift returns. Their job is mostly to improve the loot that drops around the Breaches. If an eight-mod T15 turns your map into a six-minute struggle, it is probably not worth it. A slightly easier map finished in four minutes will often win over the course of an hour. Before you start, line up four Bridge Tablets. High Blood quantity is the roll you care about most. Womb Gift quantity comes next. A Womb Gift bonus around 53% to 60% is a solid target, and tablets with those useful rolls have generally been a much smaller investment than the gear and setup required for many premium farming plans.Atlas Choices and the Actual Map RouteYou do not need a giant Atlas puzzle for this one. Unexpected Missions is useful because it adds another random modifier to corrupted Waystones, feeding the extra ground-loot side of the strategy. Partial Translations matters even more, as it boosts the explicit modifiers on your tablets. That means more value from the High Blood and Womb Gift rolls you paid for. Other nodes can help, but they are not the reason the farm works. In the map, keep it simple. Find each Breach, clear it quickly, collect the important drops, and move on. Most players lose time by treating every pack as mandatory. It is not. Skip isolated monsters and awkward detours unless they lead to a Breach or obvious reward. A good loot filter helps here. High Blood is first priority, followed by worthwhile Womb Gifts, currency, tablets, and items that are actually likely to sell.Know What to Keep and When to ConvertWomb Gifts can eat up inventory space fast, so be picky. Lavish and Ornate Womb Gifts are usually the ones worth stopping for, with Lavish gifts often valued much higher than the lower-end options. Bandit and Signet gifts may look tempting when they pile up, but they can slow down a fast rotation if you are hauling everything back to town. High Blood is where the dependable income sits. Convert it regularly into Catalysts instead of letting it collect dust. Lower-level Womb Gifts can be handy for conversion because they require less High Blood, and testing has not shown a huge reward gap that always justifies using higher-level gifts. On the Genesis 3 side, take the Birth Catalyst options you can get and steer points towards Catalyst rewards, especially chances for Birth Catalysts to become Jewel Catalysts. Also watch the storage cap. At 100,000 High Blood, new drops are wasted. It is an easy mistake, and it hurts more than missing one rare item.Get POE 2 Currency at u4gm.com and benefit from safe transactions, comfortable service, and long-term expertise that ensures your account remains protected throughout the purchase process. 0 Comments 0 Shares 216 Views 0 Reviews
 -
U4GM Helps MLB 26 HOF Mini Season Pack Farm
Diamond Dynasty players are always looking for ways to improve their collections without wasting valuable resources. HOF Mini Seasons provide an especially interesting opportunity because a focused farming strategy can combine PXP progress with Headliners Pack rewards. Rather than playing every Mini Season game from beginning to end, you can build a specialized lineup and concentrate on the objectives that matter most. This makes the method useful for players who want to maximize their time as well as their resources.
Build Around Offensive PXP
Your first task is to prepare a roster containing numerous second basemen. The strategy relies heavily on their PXP missions, so position availability matters more than creating a conventional competitive lineup. Strong hitters are preferred because they can produce meaningful progress more quickly.
Think about your roster as a development tool. If you have an excellent hitter that still needs Parallel progress, placing that card in the lineup can make each farming session more valuable. You are simultaneously pursuing the Mini Season objective and upgrading a player you may use later.
Do Not Overcomplicate the Catcher Position
The catcher slot is relatively flexible. If one of your second basemen has catcher as a secondary position, you can use that flexibility to increase the number of relevant players in the lineup. If not, simply use another catcher and focus your attention on the second baseman slots.
The purpose is not to create a perfect roster. It is to maximize the number of useful PXP opportunities without making the setup difficult to repeat.
Make Sure You Are Batting First
Once the roster is ready, the next major step is starting as the away team. This gives you the first offensive opportunities of the game. Because the farming method revolves around completing batting objectives, getting to the plate immediately saves time.
Home-team starts are less efficient because you have to play defensive innings before receiving your offensive opportunities. Restarting until you are the away team is therefore a simple but valuable optimization.
Check PXP Before You Quit
Players should also understand the difference between beginning an at bat and completing one. The game does not necessarily award the desired PXP merely because a player stepped into the batter's box. The official at bat needs to be completed and the progress needs to register.
Once the mission tracker updates, you can leave the game and begin another run. Avoiding premature exits is important because an incomplete run provides no useful time savings if you have to repeat the same progress.
Use Packs as Collection Opportunities
Headliners Packs add another layer of value to the method. While their contents are random, they can provide players that help with collections or roster development. New content can also influence card demand, making additional pack openings useful even when you are not specifically hunting one player.
The important point is that the packs come from a gameplay routine rather than requiring a direct purchase. Over many sessions, those additional opportunities can help stretch your overall resources.
Final Thoughts on Maximizing Your Diamond Dynasty Time
The strongest part of this HOF Mini Season strategy is its simplicity. You need a second baseman focused roster, strong offensive cards, an away-team start, and enough patience to let official at bats register. Once those elements are established, the process becomes easy to repeat. Players who want another option before spending buy MLB The Show 26 Stubs can make this farming loop part of their regular Diamond Dynasty routine.
Purchase MLB 26 Stubs from u4gm.com with confidence, enjoying secure transactions, a smooth buying experience, and years of professional service dedicated to protecting your account safety.
U4GM Helps MLB 26 HOF Mini Season Pack FarmDiamond Dynasty players are always looking for ways to improve their collections without wasting valuable resources. HOF Mini Seasons provide an especially interesting opportunity because a focused farming strategy can combine PXP progress with Headliners Pack rewards. Rather than playing every Mini Season game from beginning to end, you can build a specialized lineup and concentrate on the objectives that matter most. This makes the method useful for players who want to maximize their time as well as their resources.Build Around Offensive PXPYour first task is to prepare a roster containing numerous second basemen. The strategy relies heavily on their PXP missions, so position availability matters more than creating a conventional competitive lineup. Strong hitters are preferred because they can produce meaningful progress more quickly.Think about your roster as a development tool. If you have an excellent hitter that still needs Parallel progress, placing that card in the lineup can make each farming session more valuable. You are simultaneously pursuing the Mini Season objective and upgrading a player you may use later.Do Not Overcomplicate the Catcher PositionThe catcher slot is relatively flexible. If one of your second basemen has catcher as a secondary position, you can use that flexibility to increase the number of relevant players in the lineup. If not, simply use another catcher and focus your attention on the second baseman slots.The purpose is not to create a perfect roster. It is to maximize the number of useful PXP opportunities without making the setup difficult to repeat.Make Sure You Are Batting FirstOnce the roster is ready, the next major step is starting as the away team. This gives you the first offensive opportunities of the game. Because the farming method revolves around completing batting objectives, getting to the plate immediately saves time.Home-team starts are less efficient because you have to play defensive innings before receiving your offensive opportunities. Restarting until you are the away team is therefore a simple but valuable optimization.Check PXP Before You QuitPlayers should also understand the difference between beginning an at bat and completing one. The game does not necessarily award the desired PXP merely because a player stepped into the batter's box. The official at bat needs to be completed and the progress needs to register.Once the mission tracker updates, you can leave the game and begin another run. Avoiding premature exits is important because an incomplete run provides no useful time savings if you have to repeat the same progress.Use Packs as Collection OpportunitiesHeadliners Packs add another layer of value to the method. While their contents are random, they can provide players that help with collections or roster development. New content can also influence card demand, making additional pack openings useful even when you are not specifically hunting one player.The important point is that the packs come from a gameplay routine rather than requiring a direct purchase. Over many sessions, those additional opportunities can help stretch your overall resources.Final Thoughts on Maximizing Your Diamond Dynasty TimeThe strongest part of this HOF Mini Season strategy is its simplicity. You need a second baseman focused roster, strong offensive cards, an away-team start, and enough patience to let official at bats register. Once those elements are established, the process becomes easy to repeat. Players who want another option before spending buy MLB The Show 26 Stubs can make this farming loop part of their regular Diamond Dynasty routine.Purchase MLB 26 Stubs from u4gm.com with confidence, enjoying secure transactions, a smooth buying experience, and years of professional service dedicated to protecting your account safety. 0 Comments 0 Shares 176 Views 0 Reviews
More Stories